Every second counts when it comes to website performance. Whether you’re running a blog, an e-commerce store, or a business website, slow-loading pages can drive visitors away before they even get a chance to see your content.
One of the biggest culprits behind sluggish site speed? Oversized PNG images. Unlike JPEGs, which use lossy compression, PNG files retain high-quality details but often come at the cost of larger file sizes.
If not appropriately resized, these bulky images can weigh down your website, negatively affecting your SEO and user engagement.
Google’s Core Web Vitals emphasize loading speed and page experience as ranking factors, meaning an unoptimized site won’t just frustrate users – it can also lose visibility in search results.
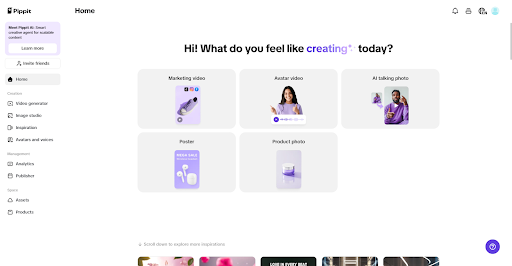
This is where Pippit comes in, offering an easy and effective way to optimize images for the web. By resizing and compressing PNG files, you can significantly improve page speed, enhance user experience, and boost search rankings, all without compromising on image quality.
The Problem: How Large PNGs Affect SEO
Big images might look stunning, but they come with a trade-off. Large PNGs take longer to load, increasing page load times, which leads to higher bounce rates. Studies show that users tend to leave a page if it takes more than three seconds to load, and Google takes this into account when ranking websites.
Additionally, slow-loading pages create a frustrating experience for mobile users, who make up a significant portion of online traffic. Since mobile-first indexing is now the standard, an unoptimized PNG-heavy site could struggle to rank on Google.
Another major issue with oversized PNGs is their impact on image search rankings. Google favors fast-loading, well-optimized images, meaning a PNG that hasn’t been resized properly may not appear in search results, even if it has the right alt text and metadata. This can result in lost traffic and missed opportunities, particularly for websites relying on image search for discovery.
The Solution: Using a PNG Resizer to Optimize Images
The best way to tackle oversized PNG files is by using a PNG resizer. But first, it’s important to understand the difference between resizing and compressing.
Resizing changes the actual dimensions of an image, making it more suitable for its intended use, while compression reduces the file size by removing unnecessary data. Both techniques are essential for optimizing PNGs without sacrificing too much quality.
For most web applications, lossy compression works best since it shrinks images without noticeable loss of detail. This is where innovative tools like this PNG resizer come in handy, as they automatically optimize images while maintaining quality. When done correctly, compression can cut load times in half without compromising how your website looks.
Additionally, considering alternative formats like WebP can be beneficial, but PNG remains the best choice for images that require transparency.
The key is knowing when to use each format – PNG for logos, icons, and graphics requiring clear backgrounds, while WebP can be an alternative for non-transparent images.
Best Practices for Resizing PNGs for SEO
Resizing PNGs is more than just reducing file dimensions – it’s about optimizing them for speed, search engine rankings, and overall user experience. Here’s how to ensure your images contribute positively to your website’s SEO.
1. Choose the Right Dimensions for Different Content Types
Not all PNGs serve the same purpose, and using the correct dimensions ensures they display correctly without slowing down your website.
- Banners and Hero Images: These should be large enough to maintain clarity on high-resolution screens but not so large that they slow down loading times. A width between 1200px and 1920px is typically ideal.
- Infographics: Since these images contain detailed text and graphics, they need to be large enough for readability while being compressed efficiently. A standard width of 800px to 1000px works well.
- Logos and Icons: These should be kept as small as possible while retaining crisp edges. Using scalable vector formats where possible is also a good alternative.
- Product Images: Resize according to e-commerce platform requirements (e.g., 1000px for Amazon, 600px for Shopify). Always maintain a balance between clarity and load speed.
2. Test Loading Speed After Resizing
After resizing PNGs, it’s essential to test how they impact your website’s loading speed. Use tools like:
- Google PageSpeed Insights: Analyzes image optimization and suggests improvements.
- GTmetrix: Provides detailed reports on loading times and image optimization.
- Lighthouse (via Chrome DevTools): Evaluates performance and provides insights on image compression.
If your page is still loading slowly, further adjustments might be needed, such as converting PNGs to WebP where possible.
3. Implement Caching for Faster Image Retrieval
Caching allows browsers to store frequently accessed images, which helps reduce load times for returning visitors. When it comes to optimizing caching for PNGs, setting long expiration dates for static images is essential.
By doing so, browsers can avoid repeatedly downloading the same image, speeding up the overall load time. Additionally, leveraging content delivery networks (CDNs) can significantly improve image delivery.
CDNs distribute your images across multiple locations, ensuring that users access them from the server closest to them, which reduces latency.
Lastly, enabling browser caching through .htaccess rules ensures that images aren’t unnecessarily reloaded each time a user revisits the page. This combined approach improves the performance and efficiency of your website, contributing to faster load times and a better user experience.
Conclusion
Optimizing PNGs isn’t just about saving space – it’s about improving website speed, user experience, and search engine rankings. Resizing images should be a routine part of any website optimization strategy, ensuring that visuals remain high quality while loading quickly.
By using a PNG resizer, implementing caching, and testing performance improvements, websites can achieve faster load times, lower bounce rates, and better rankings. The sooner you start resizing, the sooner you’ll see the benefits in your site’s performance and SEO results.
Also Read:
